Before I start talking about this design, I'd like to say a few things first.
1. RESPECT to all the nail artists out there who do magic with striping tape! It might seem like a piece of cake, but I can truly say it takes some serious skills to get a clean, flawless look.
2. RESPECT to all the Wonderwomen who go through every day life with super long nails. I'm struggling while typing this post, not to mention all the other things I have a hard time doing..
After rambling a bit, let's move on to the design..
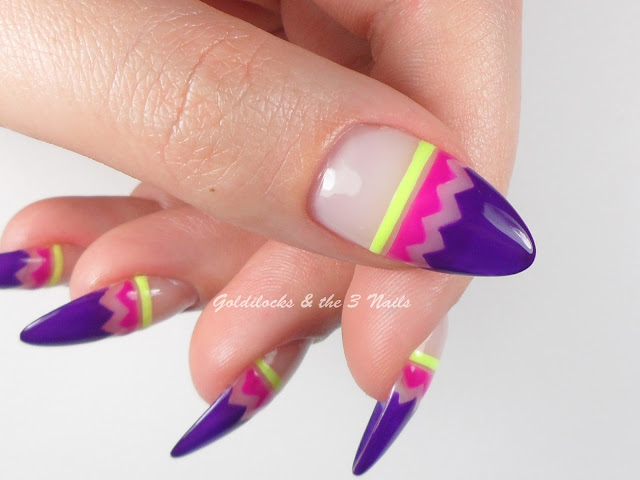
I was in the mood for vibrant neon colors and thought it would be cool to use some chevron vinyls I had bought on ebay, but never really used. As you might have noticed, I don't normally use striping tape or vinyls for my nail art, maybe only once or twice in total. So I definitely don't consider myself being an expert. It actually took me several tries and a lot of frustration to get the desired look, without everything looking smudged. And I still had some clean up to do before applying my topcoat.
But in the end all went well and I ended up having Neon Easter Egg looking nails with a kick of negative space. It wasn't really my intention, but Easter is in 6 days here in Greece, so it worked out perfectly!!
Here's a quick how to:
Apply your basecoat and let it dry completely. I'm not wearing basecoat only because I have gel nails on and it's not really necessary. Then place the striping tape/vinyls where you want them and carefully color inside the design you have created. Ideally use polishes that are one coaters, it will make it much easier. Try to remove the tape while the polish is still wet to get more crisp lines and pray while your at it! Maybe do a little dance to the nail art fairies as well! Just kidding.. But if you want to, go ahead! Finally seal with a fast drying topcoat.
And here it is... (drum roll)
Polishes used:
Orly - Key Lime Twist
Orly - Purple Crush
Orly - Saturated
Orly Sec 'N Dry Quick-Dry Topcoat


