Showing posts with label h&m. Show all posts

Saturday, January 10, 2015

The Heart Wants What It Wants | Negative Space Design

I've been flirting with the idea of doing negative space nail art for such a long time, but I never had the courage to try it. Or maybe I just didn't have the right inspiration. I don't know! Anyway, lately I've been obsessed with "The Heart Wants What It Wants" by Selena Gomez and while I was watching the video, it hit me!!! Her outfit was exactly what I needed for a negative space design. On to the outfit...

As you can see in the pictures below, in the video she's wearing a black see through top with a beautiful bralette underneath and some killer statement earrings. So, inspired by her clothes, I decided to do some black negative space on my thumb, index and pinky. I used a sheer white polish on them as a base to neutralise the color of my nails as they were a bit stained and then painted the design with a black polish. I did the front part of the outfit on the thumb and index finger and the back part on my pinky. On my middle finger I painted the shape of her earring, on a black base and finally I applied a silver glitter polish on my ring finger with a sponge to add a more glamorous touch!


Now, I had to do some research to find out if the earrings were silver or gold, since the video is black & white and they turned out to be gold. But somehow silver just seamed right and I went with that instead...

I was really nervous about how this design would turn out, since it was my first attempt at something like this, but I'm really happy with it! What do you think? Feel free to leave comments. :)


Polishes used:

Orly Bonder Basecoat
Orly - Sheer Beauty
Orly - Liquid Vinyl
H&M - Silver
H&M - Jo is in the House
Orly Sec 'N Dry Quick-Dry Topcoat

Saturday, December 27, 2014

Have A Grungy New Year!

Here we are several days past Christmas and New Year's Eve is just around the corner!! I hope you are all having a great time with your loved ones during these special days and that 2015 will be good to us and let all our wishes and dreams come true!!

I wanted to create something appropriate for New Year's Eve, something shiny, eye catching but easy at the same time. I don't know about you, but I don't like spending too much time during the holidays for my nails. I'd rather spend that extra time with friends and family. And if you like a rock and grungy twist to things like I do, I think you'll love this!

This is a technique I first saw on Chalkboard Nails, she has a great tutorial on how to achieve this distressed look and also on The Nailasaurus, but I believe it can be found on many blogs. So I thought I'd give it a try myself and see what happens!

I was inspired by my favourite colors of  fireworks, so I decided to go metallic. I used a silver polish as a base on all my nails and then a purple, a"mermaid" blue and black for the distressed effect. All you need to do is wipe the polish off the brush very well and then apply in random spots on your nails! That's really it!

I love this look because it's simple yet very unique and you don't have to worry about all nails looking alike! Tell me what you think. Have you ever tried this technique?


Polishes used:

Essence Studio Nails XXL Nail Thickener
H&M - Silver
OPI - Tomorrow Never Dies
Korres - Paradise Green
Essence - Black is Back
Orly Sec 'N Dry Quick-Dry Topcoat

Friday, December 19, 2014

Snowflake Half Moons

It's the most wonderful time of the year they say...There's music, christmas decorations, lights and glitter everywhere! In some places it's even snowing! And since we don't see snow that often here in Athens, I decided to make my own snow, on my nails! I love snowflake designs, I don't know what exactly it is about them that makes them look so special to me. I just find them very intricate and delicate at the same time, if it makes any sense. 

I think there are several colors that are associated with Christmas such as red, green, blue, white, gold and silver, at least for most of us. But for me, a rich purple also does the trick! That is why I chose a dark metallic purple, that almost looks black, as a base color and used silver to make the snowflake half moon design. I was actually debating between white and silver for the snowflakes, but I felt that white would look too flat and thought it would be more appropriate to stick with the metallic texture of the base. So we have a winner..Silver it is!!!

And just to switch things up a bit and make it more interesting, I used a silver base on my ring finger and decorated it on the side with black iridescent rhinestones (ebay). I think the rhinestones add some bling to the whole look without making it too much to wear and they definitely give some depth and texture to it as well.

All in all, I'm very pleased with how this turned out. I think this is an easy and quick design that looks very elegant and feminine. I hope you like it and give it a try. :)


Polishes used:

Orly Bonder Basecoat
Seventeen - 493
H&M - Silver
Orly Sec 'N Dry Quick Dry Topcoat

Friday, November 14, 2014

World Diabetes Day Nail Art

November is considered Diabetes Month in most countries and specifically November 14 is World Diabetes Day. So, why not support the cause and help raise awareness?

Since I don't know much about diabetes I won't pretend to be a doctor and I'll leave it to the experts. For any of you who are interested, you can visit the International Diabetes Federation  website to read and learn more about it.

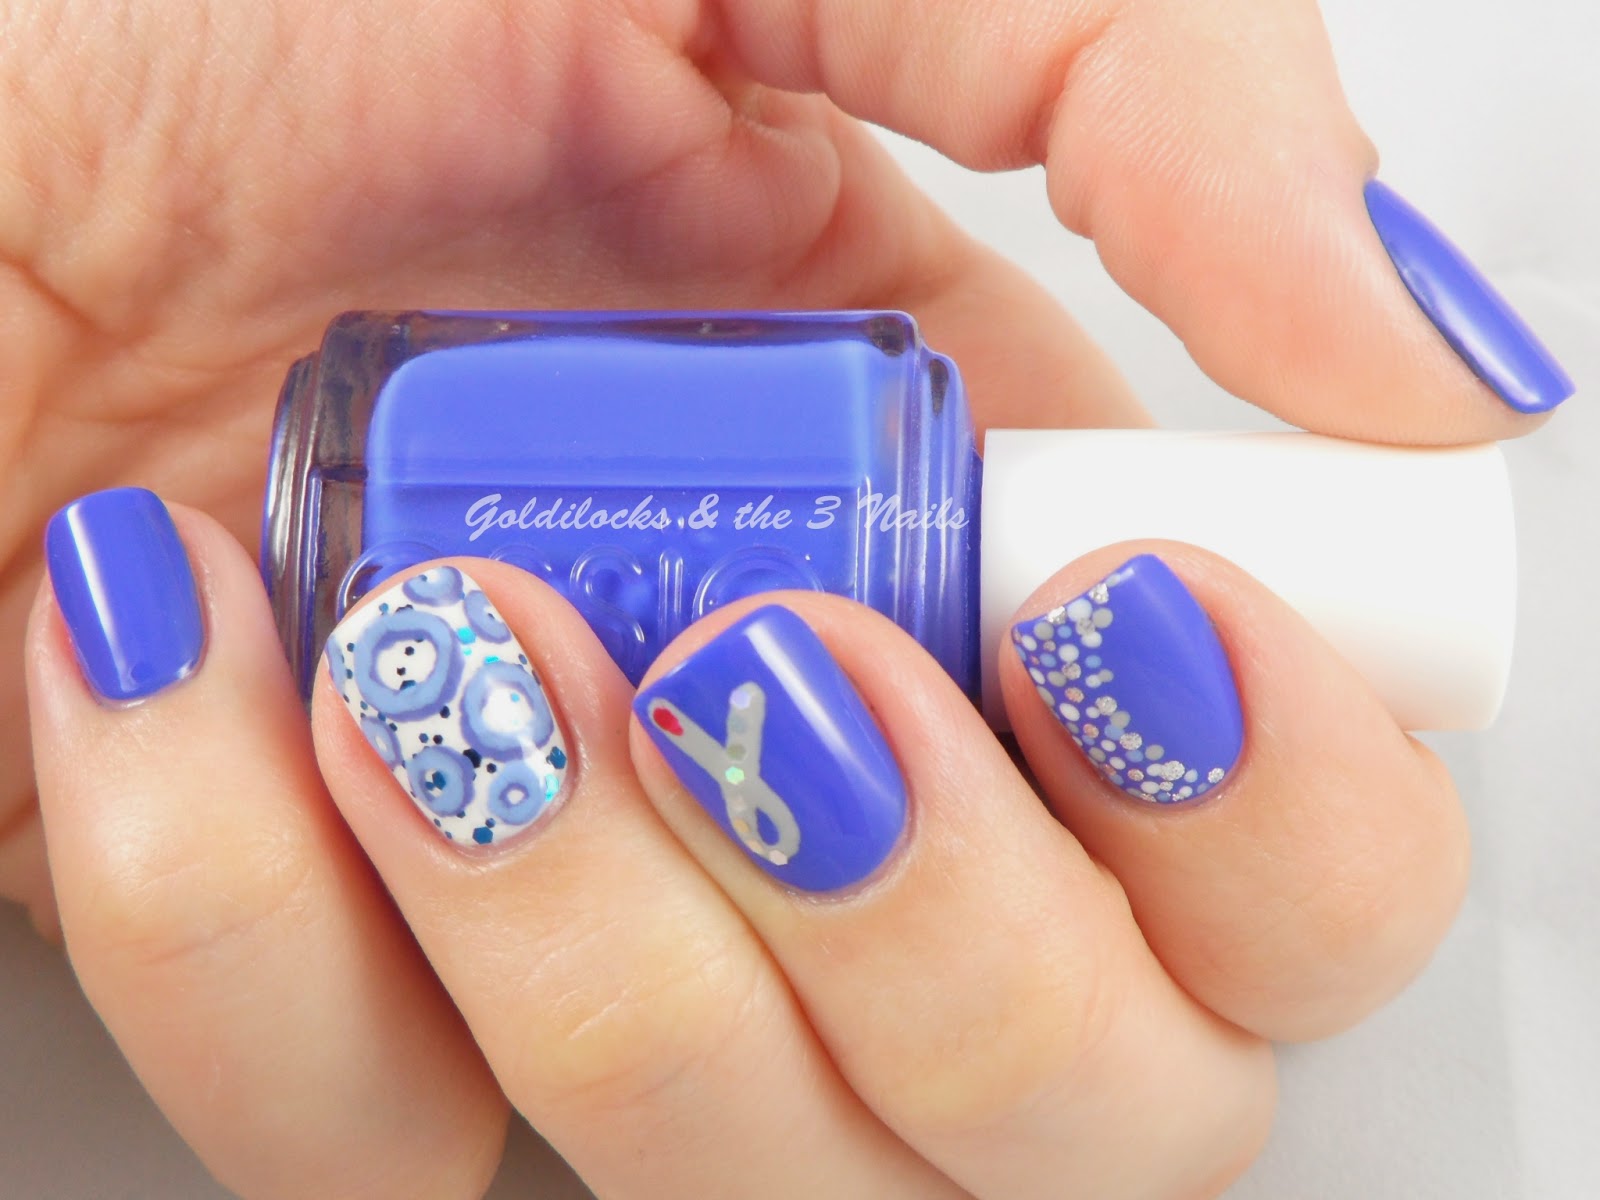
The World Diabetes Day logo is a blue circle and the grey ribbon is a symbol for diabetes awareness and that is why I decided to use both in this design.

I would also like to share with you one of my favourite make up artists on Youtube. Her name is Lex and she owns Madeyewlook and MadeULook Twice. She has amazing make up and body painting skills, OBVIOUSLY.. And she does a great job raising awareness and money to help find a cure for diabetes. So, if you are into make up, body painting or anything creative, go take a look.


Polishes used:

Essence Studio Nails XXL Nail Thickener
Essie - Lolipop
Essie - Butler Please
H&M - Did I Tell You?
H&M - Silver
Seventeen - 39
Seventeen - 103
Seventeen - 270
Tommy G - 431
Rush 60 Second High Speed Top Coat

Sunday, October 19, 2014

Breast Cancer Awareness Nail Art

October is Breast Cancer Awareness Month, an annual international campaign organised to increase awareness of the disease. So, I decided to do my part to spread awareness, by doing an easy inspired nail art design.

Learn all you need to know about breast cancer here and don't forget it's all about prevention. Always remember to check yourselves regularly ladies!

Now, on to the nail art design! I used a thin brush to draw the pink ribbons on my thumb and ring finger and a dotting tool in different sizes to do the dots on my index. On my middle finger I used a sponge to apply the glitter polish (a little trick I've seen from The Nailasaurus in the past), to get full coverage. Finally, I used some clear polish to apply the rhinestones (which I bought from ebay) on my nails.


Polishes used:

Beauty Secrets - Base Coat
Seventeen - 10
Seventeen - 17
H&M Glitter - Pink
Rush 60 Second High Speed Top Coat

Monday, September 29, 2014

Jo is in the House!

I originally didn't have a plan to start with, for this manicure. The only thing I knew for sure was that I was in the mood for something shiny and glittery. So...I lined up all my glitter polishes and decided to use "Jo is in the House" from H&M. I've had it for such a long time and was dying to give it a try and see how it looks in full coverage...
Everything else just came to me along the way and I ended up with a little party on my nails! Yay!


The nail polishes I used:

Beauty Secrets - Base Coat
Erre Due - Heart Trick (248)
Essie - Butler Please
H&M - Jo is in the House
H&M - Silver
Seventeen - 103
Essence - Better Than Gel Nails Top Coat

Well...I hope you like it!
Feel free to leave comments. :)