Showing posts with label nail envy. Show all posts

Saturday, September 5, 2015

Tie Dye Gradient & Geometric Nail Art

Long time no see!
A lot of things were going on during the past months, that made my mood and inspiration go down the drain. To top that, my nails were very weak at that point, so I decided to take a long break not only from blogging but from polishing my nails as well.
Now I'm back and even though summer is typically over, here in Greece it's very hot and sunny, so I'm still in a very colorful mood!

Before we even move on to the pictures, just let me say this.
1. I love gradients even though they're a real pain to clean up.
2. I love line work, geometric shapes and aztec prints on nails and there are so many nail artists out there that I admire just for that!
So after that being said and the title of the post, I guess you can see where this is going..

Here we go..


For this look I started off with two coats of white nail polish as a base, so that the colors I'd use on top of it would pop and applied a fast drying top coat. We need our base to be completely dry before we start "sponging" the color on. Then I took a make up sponge, cut it in a square shape and made it as smooth as possible for the polish to apply evenly. I chose very bright and neon colors for this almost tie dye looking gradient effect, randomly placed them on the sponge (see picture below) and dabbed it onto my nails. After the first layer had dried I did a second layer, reapplying nail polish on the sponge after each use, to get a more intense look. Wherever I felt like I needed more color, I just used small pieces of the sponge to apply the nail polish and topped it again with a fast drying top coat for an even finish.


This is what my nails looked like after the clean up.
PS: You could also leave your nails like this if you like. It still looks very beautiful.
However, I chose to keep going..


After the messy part was over, I took a long bristle nail art brush, that I had trimmed to be very thin and used white acrylic paint to do my line work. Keep in mind that brushes with very long bristles help us to make very straight and long lines, compared to short bristle brushes that are better for smaller details. Once that was dry, I used fast drying top coat (Again!) to seal everything.

All in all this was quite a time consuming design, but I believe it's fun, eye catching and well worth a try. Feel free to leave comments with your thoughts! :)

Polishes used:

OPI Nail Envy Maintenance Nail Strengthener
Seventeen - 103
Orly - Purple Crush
Orly - Risky Behavior
Orly - Key Lime Twist
China Glaze - Too Yacht To Handle
Sinful Colors - Endless Blue
Seche Vite Fast Drying Topcoat

Friday, February 20, 2015

OPI My Dogsled Is A Hybrid Swatch

Whoever follows me on instagram has probably seen how naughty I was during my last visit at Sephora about 2 months ago. I bought the mini Nordic Collection from OPI which contains 4 polishes: "My Dogsled is a Hybrid", "Do You Have this Color in Stock-holm?", "My Voice is a Little Norse" and "How Great is Your Dane?". I also got "Skating on Thin Ice-Land" in full size, which is from the same collection as well and last but not least a duo from the Coca-Cola Collection, "Coca-Cola Red" and "Turn on the Haute Light", both in full size. So, as you've probably figured already, I kinda went OPI crazy!

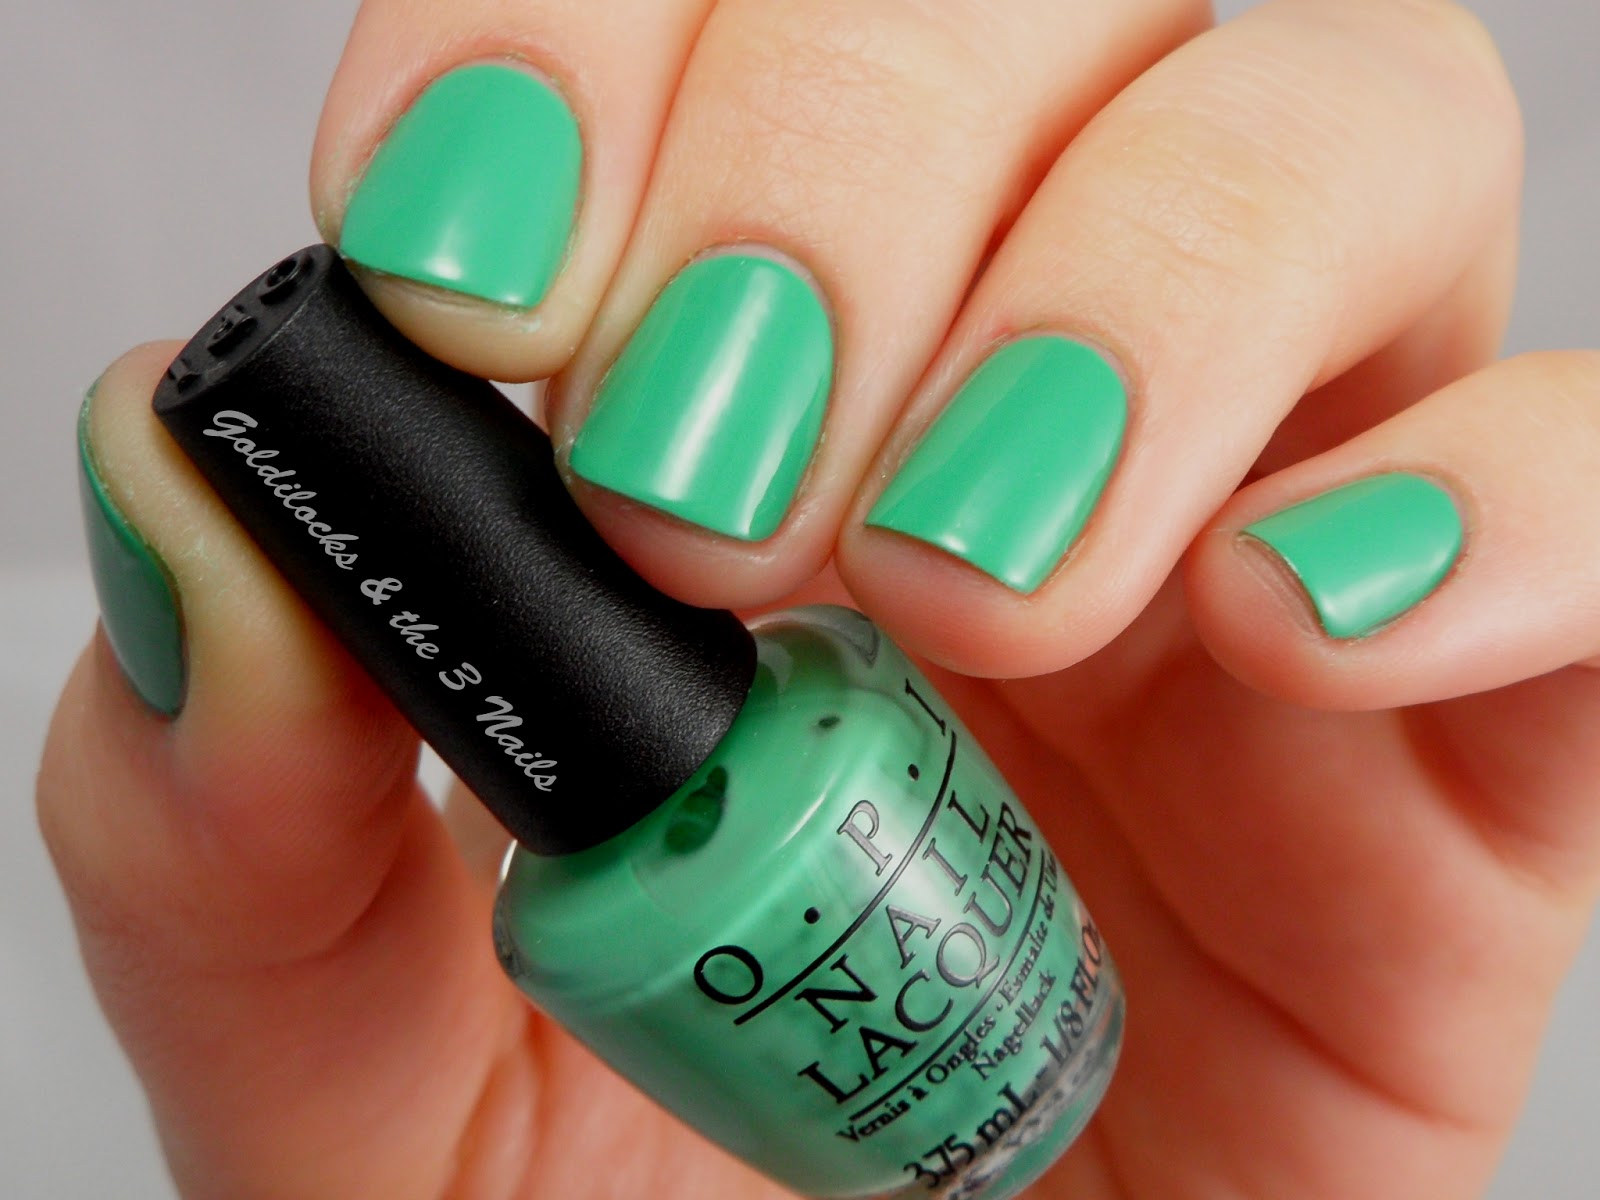
Since I bought all of these babies I hadn't had the chance to try them out, so I definitely want to show you swatches of the colors and I thought I'd start with "My Dogsled is a Hybrid" from the mini collection. This polish is a creamy sea green according to OPI and I couldn't agree more with the description because it is more on the green side rather than on the mint, as I imagined it would be in the beginning. The formula is great and it applies beautifully in two coats, although if you 're careful enough it could be a one-coater. But remember it's always better to apply two thin coats of polish rather than one thick one. ;)

I really love this polish and have nothing bad to say about it. Or maybe just one little thing, which isn't really about the polish itself but about its size..I've never owned a mini polish in my life and it was a pain trying to take a decent picture without my hand pose looking all weird with that tiny bottle. I know, I know..I have serious problems! LOL.

So tell me, what do you think of it?


Polishes used:

OPI Nail Envy Maintenance Nail Strengthener
OPI - My Dogsled Is A Hybrid
Orly Sec 'N Dry Quick-Dry Topcoat

Saturday, December 13, 2014

Geometric Christmas Nail Art

Continuing the Christmas theme, I wanted to take a break from the acrylic paints and the cartoons. So, I decided to keep things simple and do a more wearable and less time consuming design. Now, I did want something simple, but I still wanted it to be playful and more on the elegant and feminine side. (I hope I managed to achieve that.)

For this design, I chose a red wine color as a base for all my nails and used a gold glitter polish to make some geometric designs on my index and ring finger. As you can see, I also used a dotting tool (from ebay) with the base color to make some dots on the glitter. On my middle finger, I used the same glitter polish to make a minimal Christmas tree and a gold round stud instead of a star. Finally, I used the same studs (from ebay) to decorate my thumb and pinky and sealed everything with a fast drying top coat.

I really hope you like this nail art design, tell me what you think. If you try this out, I would really love to see your recreations, so don't forget to use the hashtag #xrisompouklitsa on instagram or leave me a picture on Facebook. :)


Polishes used:

OPI Nail Envy Maintenance Nail Strengthener
OPI - Malaga Wine
Nails Inc - Chelsea Embankment
Essence Better Than Gel Nails Top Coat

Thursday, November 6, 2014

Leopard Print Nail Art

Since I already had a nice brown base on my nails from the previous post, I decided to get a little wild...And do a leopard print design! I didn't do all of my nails because it would probably be too much. Not that it isn't too much with all that bling going on...But hey, sometimes a girl needs a little more bling to have some fun!

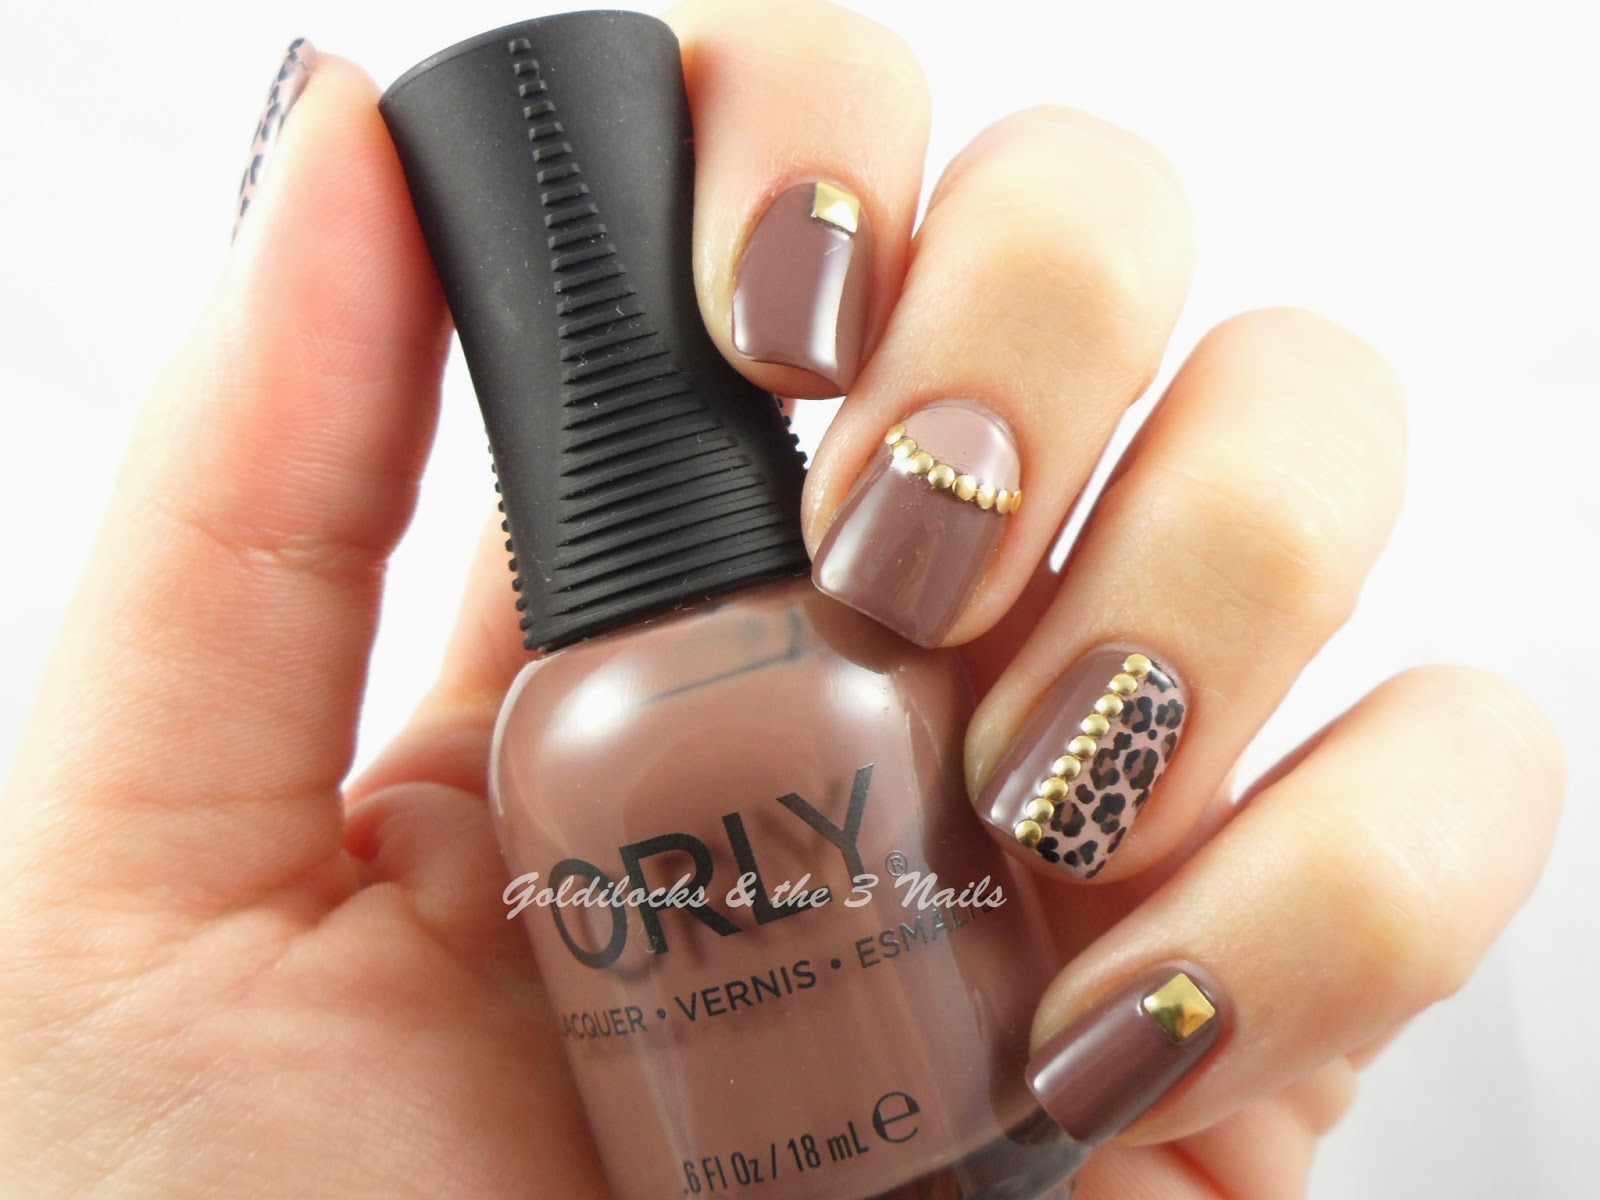
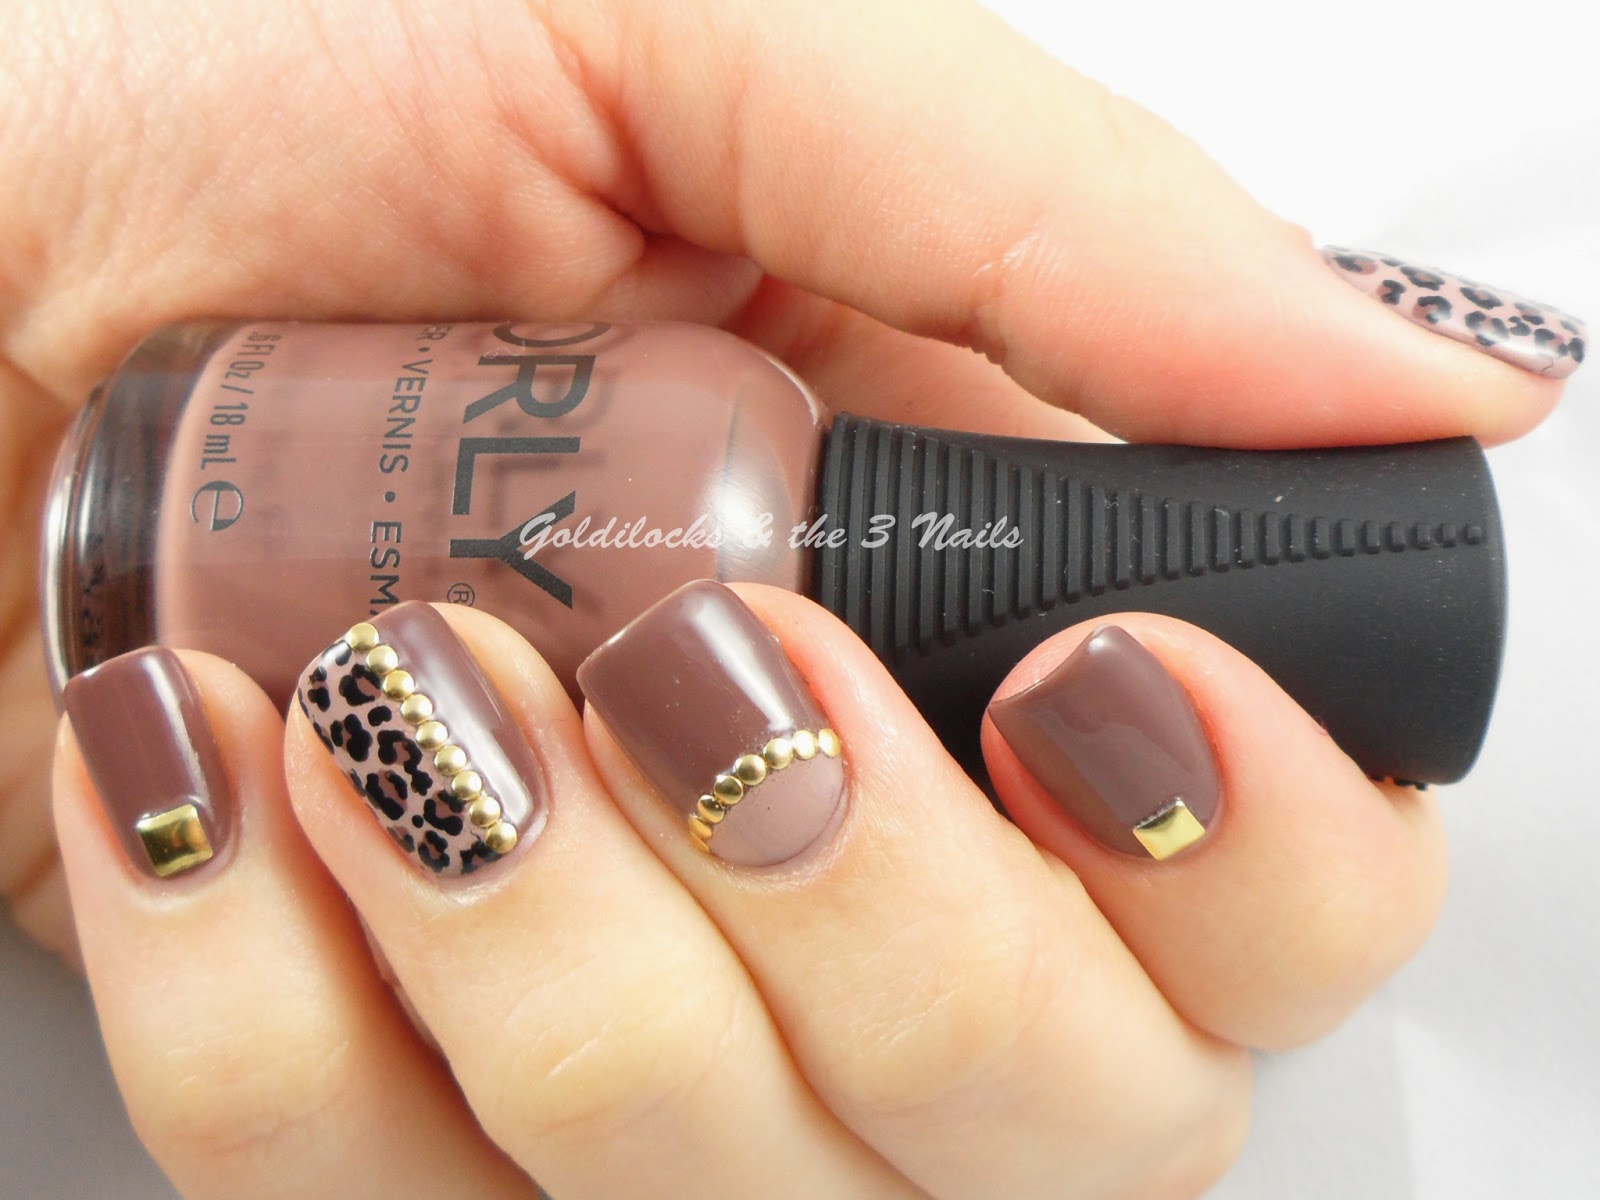
For the leopard print, I made dots with the brown polish in different sizes and I used a black polish and a dotting tool to make random "C" and "O" shapes around the dots. On my middle finger, I did a half moon and finally I decorated all fingers with round and square studs that I got from ebay.

Normally I wouldn't use a top coat over these studs, but unlike the rhinestones that are flat, they are hollow at the bottom and they'll come of easily if you don't seal them. Oh! And a little tip on the leopard print: Don't overthink it, leopard spots are always different!

Generally,  I'm very pleased with the design, although it kinda bothers me that the leopard prints are off center. Then again, that might just be me going crazy over it. I'll just have to work on that. :)


Polishes used:

OPI Nail Envy Maintenance Nail Strengthener
Orly - Prince Charming
Essence - Dare it Nude
Essence Better Than Gel Nails Top Coat

Monday, November 3, 2014

Orly Prince Charming Swatch

It's been a busy week but I'm back with a swatch for you. I got Prince Charming a couple days ago and I instantly fell in love with it. This polish was from Orly's "Once Upon A Time" Fall 2009 collection and I can already tell it's going to be one of my favourite Fall/Winter polishes.

Prince Charming is a beautiful brown-taupe creme and it really looks like nutella in a polish bottle..Yummm! The formula is great, like all the Orly polishes I have tried up until now and you can get full coverage in only two coats.

Also, there is a dupe for this, Essie's "Hot Coco" from the Winter 2010 collection. I own both so I can say for sure that they are exactly the same color! I believe that OPI's "Over The Taupe" is also a dupe for Prince Charming and I'm sure there are more if you do your own little research too.

So..I don't know about you girls, but I definitely found my Prince Charming!
What do you think? Will you give into his charm?  :)


Polished used:

OPI Nail Envy Maintenance Nail Strengthener
Orly - Prince Charming
Rush 60 Second High Speed Top Coat

Friday, October 17, 2014

Orly Sand Castle Simple Nail Art Design

In the previous post I promised you a simple nail art design and...Ta daaa!!!
Since I already had Sand Castle on my nails, I figured it would look really nice with black details. So, I tried to keep things simple, yet very chic and elegant.

I used a striping tape (from ebay) to make the lines on my index, middle and ring finger and painted on top with a black polish. I decorated my thumb and pinky with black rhinestones (from ebay), 3 on each nail.

I know a lot of nail bloggers/artists say it's better to take the striping tape off immediately before the polish dries, but it doesn't really work for me. I prefer to take it off once the polish is completely dry, to get a crisp line. Which in this case didn't happen, because I wasn't patient enough and my lines got a little smudged!

Normally my "ocd" would kick in, but instead of removing everything and starting all over again...I decided to be brave, touch it up and show it to you anyway. So, please be gentle!

And for all of you who would like to try this, I would suggest trying to take off the striping tape both ways, to see what works best for you. If things go wrong, no big deal! Practice makes perfect and let's not forget that it's all about being creative and having fun!


Polishes used:

OPI - Nail Envy Maintenance Nail Strengthener
Orly - Sand Castle
Essence - Black Is Back
Essence - Better Than Gel Nails Top Coat

Wednesday, October 15, 2014

Orly Sand Castle Swatch

A few days ago, I visited Orly to get some nail polish and boy was I in trouble...There I was standing in front of all the polishes, staring at them like a little kid in a candy shop! Which one to choose? I wanted all of them! I tried to think of the colors in my collecton and cross out any similar ones...
So, I chose Sand Castle and here I am with a swatch for you.

This is a nude frost shimmer according to Orly. As you can see it's a beautiful rose gold color,
or coppery pink as some might say. Its formula is great, although you have to be careful when applying it. Too many brush strokes can leave noticeable lines, something that happens to most of the polishes with this finish. It is a 2 coater, but I used 3 coats just so it would show up as accurate as possible on camera.

So, take a look for yourselves and please ignore the bubbles on my nails. My top coat suddenly decided it was okay to act up!


Polishes used:

OPI - Nail Envy Maintenance Nail Strengthener
Orly - Sand Castle
Essence - Better Than Gel Nails Top Coat

P.S. Stay tuned for a simple nail art design done with this beauty! Coming very soon...

Thursday, October 9, 2014

Muir Muir on the Wall Swatch

 In the previous post I promised you, I would do a swatch for OPI's "Muir Muir on the Wall" and I'm a girl who keeps her promises...Soooo, here you have it!

Now, I can't even find words to tell you how much I love this color! It's a black based metallic polish, that goes from plum to gold/bronze depending on the lighting, same as "Peace & Love & OPI". In the bottle I can also see a green tone, but my eye doesn't really catch it on my nails. Oh well!

On to the formula. Compared to "Peace & Love & OPI", I found it to be a bit more sheer and a little more tricky to apply. If you're careful enough you can definitely get full coverage with 2 coats, but just to be sure I did 3 thin coats.

All in all, I think this is a drop dead beautiful color!
What do you think?


Polishes used:

OPI - Nail Envy Maintenance Nail Strengthener
OPI - Muir Muir on the Wall
Essence - Better Than Gel Nails Top Coat


Thursday, October 2, 2014

Peace & Love & OPI Swatch

 Recently, I was going through the sales counter at Sephora and I found OPI's "Peace & Love & OPI" and "Muir Muir on the Wall" polishes from the San Francisco Collection for Fall/Winter 2013. Truth be told, when the collection was originally released I wasn't really into duo/multichromes at all. But now...I don't know what got into me!
I don't know if it was Fall, that was just around the corner, the way that the colors were glowing through the bottle, the price...Or even all the above...I just had to have them!

I thought I'd start with a swatch of "Peace & Love & OPI" and in another post I'll show you "Muir Muir on the Wall". Now, I know I'm pretty late on doing this swatch and that there are already plenty of swatches out there...But I just loved the way it looked and I really wanted to share it with you.

While I was taking pictures of the polish, I felt like I was playing a guessing game. Trying to guess exactly what color it is. And believe me, that was tricky! So to me, "Peace & Love & OPI" is a beautiful metallic grey based polish that goes from blue, to purple, to green depending on the lighting. Others say that it shifts between blue and purple, green and purple, or even teal and mauve. Maybe that's a better way to describe it, I don't know. I'll leave it up to you, to decide...

As for the formula, I was expecting it to be pretty sheer. But it's not! It has full coverage with two coats. And although the brush strokes are quite noticeable, with a top coat everything evens out.

Finally, I believe there are a couple of dupes for this, such as "For the Twill of It" by Essie and "Chic Reloaded" by Essence. I can't say that for sure because I do not own them, but they look almost identical to me, at least from the swatches I've seen.


Polishes used:

OPI - Nail Envy Maintenance Nail Strengthener
OPI - Peace & Love & OPI
Essence - Better Than Gel Nails Top Coat