Thursday, February 26, 2015

OPI Do You Have this Color in Stock-holm? Swatch

If you asked me which color from the mini Nordic Collection is the most eye-catching to me, I would say that "Do You Have this Color in Stock-holm?"is the one. It's a creamy blue-violet polish which is dark, rich and vibrant at the same time. It might not sound right but when you see it, you will probably understand what I mean.

I found it a bit hard to capture the color in the pictures properly. Somehow it either leaned more on the blue side or on the purple side, but I did my best to be as accurate as possible. I expected the formula to be similar to "My Dogsled is a Hybrid", but it was a lot trickier to apply. The first coat came out very streaky and patchy and for a moment I'll admit I was disappointed, but magically with the second coat everything was evenly covered up. So it's not really that bad since it looks perfect in the end, but it might be negative for some. Also, I tried it on top of different basecoats and found that it applies much better on top of a more satin or matte basecoat than on a shiny one, where the polish seems to slide off the base. Actually with a matte-ish basecoat the first coat doesn't apply streaky at all! And I really do prefer these kind of basecoats in general.

Honestly, I really love this color and I would like to get it in full size as well. I hope you found this to be helpful. Tell me if you like this polish. And if you already have it, I'd love to see if you had the same opinion about the formula and the application. :)


Polishes used:

Orly Bonder Rubberized Basecoat
OPI - Do You Have this Color in Stock-holm?
Orly Sec 'N Dry Quick-Dry Topcoat

Friday, February 20, 2015

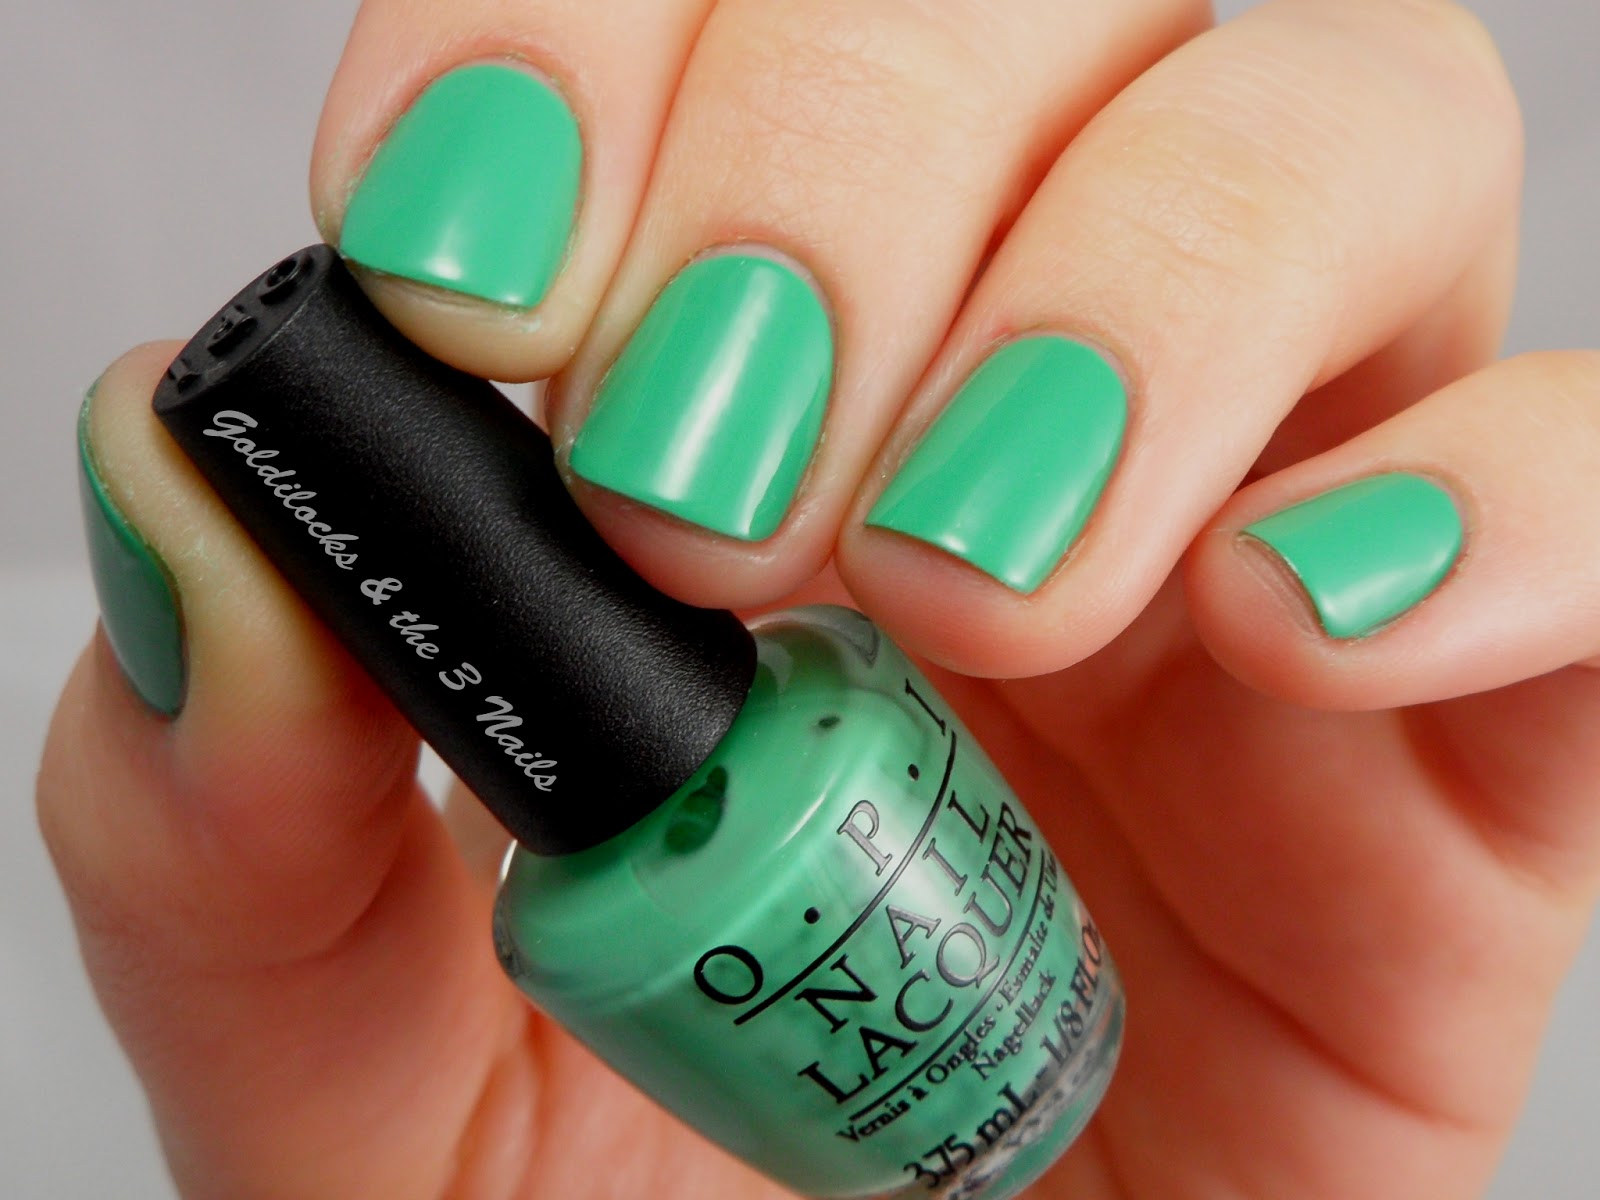
OPI My Dogsled Is A Hybrid Swatch

Whoever follows me on instagram has probably seen how naughty I was during my last visit at Sephora about 2 months ago. I bought the mini Nordic Collection from OPI which contains 4 polishes: "My Dogsled is a Hybrid", "Do You Have this Color in Stock-holm?", "My Voice is a Little Norse" and "How Great is Your Dane?". I also got "Skating on Thin Ice-Land" in full size, which is from the same collection as well and last but not least a duo from the Coca-Cola Collection, "Coca-Cola Red" and "Turn on the Haute Light", both in full size. So, as you've probably figured already, I kinda went OPI crazy!

Since I bought all of these babies I hadn't had the chance to try them out, so I definitely want to show you swatches of the colors and I thought I'd start with "My Dogsled is a Hybrid" from the mini collection. This polish is a creamy sea green according to OPI and I couldn't agree more with the description because it is more on the green side rather than on the mint, as I imagined it would be in the beginning. The formula is great and it applies beautifully in two coats, although if you 're careful enough it could be a one-coater. But remember it's always better to apply two thin coats of polish rather than one thick one. ;)

I really love this polish and have nothing bad to say about it. Or maybe just one little thing, which isn't really about the polish itself but about its size..I've never owned a mini polish in my life and it was a pain trying to take a decent picture without my hand pose looking all weird with that tiny bottle. I know, I know..I have serious problems! LOL.

So tell me, what do you think of it?


Polishes used:

OPI Nail Envy Maintenance Nail Strengthener
OPI - My Dogsled Is A Hybrid
Orly Sec 'N Dry Quick-Dry Topcoat

Thursday, February 12, 2015

Valentine's Day Nail Art | Heart Candy

Hey all you lovebirds!
A lot of stuff has been keeping me busy lately and I haven't posted anything for almost a month! I feel very guilty.. Anyway, Valentine's Day is almost here and I thought it would be nice to share a simple and easy design to inspire all of you who are looking for something suitable for the day.

I'm not a big fan of Valentine's Day, but when I think of it, heart candy comes to mind. I just love all the bright colors, the cute and funny messages printed on them. I think they're great for nail art because there are plenty of colors and messages to choose from and use them to make a fun mix & match nail design. I chose pink, light blue and light purple as a base for my index, middle and ring finger because those are my favourites and I used a rasberry pink polish to write the messages that are printed on the candy. Finally, I used a white polish as a base on my thumb and pinky and used a dotting tool to paint little hearts with the same colors I used before and a little bit of yellow. That's really it!

I think this is a very fun, cute and girly design. I hope you like it and give it a try..Also, I hope you have an amazing Valentine's Day either if it's with your sweetheart or just your friends.
Oh! And don't forget to share your recreations with me on facebook or instagram using the hashtag #xrisompouklitsa. :)


Polishes used:

Orly Bonder Rubberized Basecoat
Orly - White Tips
Tommy G - 429
Tommy G - 469
Essence - Hello Marshmallow!
Essence - Destination Sunshine
Sally Hansen - Tickle Me Pink (535)
Orly Sec 'N Dry Quick-Dry Topcoat

Monday, January 19, 2015

Nail Polish Chipping And How To Prevent It

There's nothing more frustrating than nail polish chipping after a day or two of a freshly done manicure! And I know we've all been there. There are plenty reasons why nail polish chips and I will share them with you, along with some tips on how to prevent them. Let's get started!


Humidity:
Soaking your hands in water is great to soften your cuticles, but not so great for your nails. Nails absorb water while soaking, preventing polish from adhering properly to your nails. What happens is that nails absorb water and they temporarily expand. So when the water evaporates, their shape goes back to normal, causing the polish to lift off the surface of the nail and chip. Avoid soaking your hands in water for a long time during the manicure and even better try doing a waterless manicure, using a cuticle remover to make things easier. It's also important to avoid water after the manicure and don't forget to wear gloves when needed.

Oil:
Our nails produce natural oils the same way our skin does. When it comes to our manicure we do not want any oils, either it's the natural oils of our nails or residue from soap, hand lotions etc. Any kind of oil will prevent our polish from adhering to the nails. It's important to prep our nails before we start polishing. After pushing up/cleaning our cuticles we can use a sanding/buffing block to gently remove the shine from our nails (do NOT overdo it with the buffer, we don't want to weaken them!) and then we can either use a special product (primer) to remove the oils from our nails, alcohol or pure acetone, which is more drying and harsh for your nails. Nail polish removers aren't ideal for this because they contain oils or other moisturising ingredients to be less harsh and wouldn't completely remove the oils from your nails.

3-4 Way Buffer Blocks/Files:
Nails are porous, they can absorb the pigments in polishes and get stained. Using a basecoat before polishing can help from absorbing the pigments, but still not 100%. A 3-4 way buffer block/file can help smooth the nails, add a beautiful shine to them and seal the pores of your nails, preparing them for the basecoat and nail polish. This way they have less chances of absorbing the pigments. And while the sanding/buffing block will remove the natural shine and oils from your nails and add a slight texture to them, allowing the nail polish to adhere properly, a shinning buffer block might prevent it from properly adhering to the nails. Everything has its pros and cons, so you might want to weigh them and then make your decision.

Bad Polishing Technique:
For a longer lasting manicure there are three important steps: 1) Basecoat, 2) Nail Polish, 3) Topcoat. For best results never skip steps. Remember to apply thin layers of polish and always seal the free tip of your nail in each step. It's better to apply 3 thin layers of polish than 1 or 2 thick ones. Thick layers of polish dry slower and might create air bubbles during application, which can possibly interfere with the proper adhesion. Finally, once you're done with your manicure, you also might want to apply top coat every day or every other day to help maintain it longer.

Nail Polish Quality:
It's important for nail polish to be Formaldehyde, Toluene and DBP free, because they are proven to be toxic. All those nasty chemicals might make polishes longer lasting, but is it really worth "paying the price"?

Nail Polish Consistency:
As mentioned above, thick polish dries slower and might apply bubbly, causing it to chip. It doesn't really mean you have to toss it away though. When your polish gets thicker, only use a nail polish thinner to thin it out. NEVER use alcohol or nail polish remover. If you think about it, it doesn't make any sense using a product that dissolves it, to thin it out. It might work for a short period of time, but in the long run it will only ruin your beautiful polish and it will eventually get thick again. Also, you want to avoid shaking your polish up and down the same way you would shake a soda can if you were to pull a prank on a friend! Lol! That will only create air bubbles and we DON'T want that! Instead, try rolling it between your palms, holding it upside down. And last but not least...

 Nail Condition:
Nail polish tends to lift off and chip on weak and brittle nails more often than on healthy and strong nails. Filing them back and forth can weaken them, cause them to peel and break. Try filing them only in one direction. Also frequent usage of acetone and a buffing block can dry up and weaken the nails. If all the above are not the case, then maybe you want to look for the suspect on the inside. Weak and brittle nails can be caused by lack of iron, zinc, biotin. or may be a sign of a medical condition. See your doctor and follow their instructions. Don't play doctor yourself! A more nutritious diet could make a huge difference, also a ridge filling, calcium enriched, or strengthening basecoat could help. Finally, from my experience nail polish lasts longer on short nails rather on long ones, since they're less exposed. And I know this is irrelevant to the nail condition and has to do with length, but I thought I'd just mention it here. 

Well, I really enjoyed writing this post and I hope this was interesting and helpful for you. Nail polish and nail art are fun, but always in moderation! Remember to give your nails a little break from time to time and try to keep your nails and cuticles moisturised from the inside and out. If you have any other tips that I may have not included, feel free to let me know. I'm always happy to read comments. ;)

Saturday, January 10, 2015

The Heart Wants What It Wants | Negative Space Design

I've been flirting with the idea of doing negative space nail art for such a long time, but I never had the courage to try it. Or maybe I just didn't have the right inspiration. I don't know! Anyway, lately I've been obsessed with "The Heart Wants What It Wants" by Selena Gomez and while I was watching the video, it hit me!!! Her outfit was exactly what I needed for a negative space design. On to the outfit...

As you can see in the pictures below, in the video she's wearing a black see through top with a beautiful bralette underneath and some killer statement earrings. So, inspired by her clothes, I decided to do some black negative space on my thumb, index and pinky. I used a sheer white polish on them as a base to neutralise the color of my nails as they were a bit stained and then painted the design with a black polish. I did the front part of the outfit on the thumb and index finger and the back part on my pinky. On my middle finger I painted the shape of her earring, on a black base and finally I applied a silver glitter polish on my ring finger with a sponge to add a more glamorous touch!


Now, I had to do some research to find out if the earrings were silver or gold, since the video is black & white and they turned out to be gold. But somehow silver just seamed right and I went with that instead...

I was really nervous about how this design would turn out, since it was my first attempt at something like this, but I'm really happy with it! What do you think? Feel free to leave comments. :)


Polishes used:

Orly Bonder Basecoat
Orly - Sheer Beauty
Orly - Liquid Vinyl
H&M - Silver
H&M - Jo is in the House
Orly Sec 'N Dry Quick-Dry Topcoat

Tuesday, January 6, 2015

Faking A Glitter Indie Polish!

First post of the year, I'm so excited!!! I haven't posted anything for quite a long time because I was sick and the smell of nailpolish wasn't exactly helpful with my breathing problem and coughing. But here I am now and my resolution for 2015 is to be happy, to do things I love and to post as much nail art as I can.

I was going through pictures on instagram and I came across a swatch of Picture Polish "Frosting", which you can buy here. This puppy and I instantly had a very special moment! I fell in love! Unfortunately I do not own any polishes of the brand, they don't ship to Greece as far as I know, so I decided to recreate this look on my own.

I used some hexagon glitter on top of my base coat, using a fan brush to apply it and then topped it with two coats of a sheer pink polish. I bought the glitter from the crafts section of a local toy store and I'm thinking of getting these from ebay as well. You can also find this kind of glitter in any craft store or on bornprettystore. I used the 3 top glitters of the picture below but the actual nail polish also has heart glitter pieces which I don't have. Oh well!

I am really happy with the final look, I think it looks very girly and cute. What do you think? Is this something you would try?


Polishes used:

Orly Bonder Basecoat
Orly - Angel Face
Orly Sec 'N Dry Quick Dry Topcoat

Saturday, December 27, 2014

Have A Grungy New Year!

Here we are several days past Christmas and New Year's Eve is just around the corner!! I hope you are all having a great time with your loved ones during these special days and that 2015 will be good to us and let all our wishes and dreams come true!!

I wanted to create something appropriate for New Year's Eve, something shiny, eye catching but easy at the same time. I don't know about you, but I don't like spending too much time during the holidays for my nails. I'd rather spend that extra time with friends and family. And if you like a rock and grungy twist to things like I do, I think you'll love this!

This is a technique I first saw on Chalkboard Nails, she has a great tutorial on how to achieve this distressed look and also on The Nailasaurus, but I believe it can be found on many blogs. So I thought I'd give it a try myself and see what happens!

I was inspired by my favourite colors of  fireworks, so I decided to go metallic. I used a silver polish as a base on all my nails and then a purple, a"mermaid" blue and black for the distressed effect. All you need to do is wipe the polish off the brush very well and then apply in random spots on your nails! That's really it!

I love this look because it's simple yet very unique and you don't have to worry about all nails looking alike! Tell me what you think. Have you ever tried this technique?


Polishes used:

Essence Studio Nails XXL Nail Thickener
H&M - Silver
OPI - Tomorrow Never Dies
Korres - Paradise Green
Essence - Black is Back
Orly Sec 'N Dry Quick-Dry Topcoat